Setup local Spark Cluster on Mac and explore UI for Master, Workers, and Jobs(Python using Jupyter notebook)
What is covered
- In this blog, I would describe my experiments about setting up a local (standalone) Spark cluster on Mac M1 machine.
- Would start jupyter notebook using anaconda navigator
- Submit jobs using Python code executing in the notebook with jobs submitted to the master created above.
- Explore the UI for:
- Master
- Worker
- Jobs (transformation and action operations, Directed Acyclic Graph)
Why local (standalone) server
- local server is a simple deployment model and is possible to run the daemons in a single node
- Jobs submitted using pyspark are explored using the same UI in previous blog
- Jobs submitted using python programs are explored in this blog
Start the master and worker
- After installation of pyspark (using homebrew), scripts for starting the master and worker were available at the following location:
cd /opt/homebrew/Cellar/apache-spark/3.2.1/libexec/sbin
- start the server (note that would be specific to the machine)
% ./start-master.sh
starting org.apache.spark.deploy.master.Master, logging to /opt/homebrew/Cellar/apache-spark/3.2.1/libexec/logs/<your-local-logfile>.out
- check the log file for the spark master server details ( is obtained from the previous step>
% tail -10 /opt/homebrew/Cellar/apache-spark/3.2.1/libexec/logs/<your-local-logfile>.out
...
22/05/18 07:41:57 INFO Utils: Successfully started service 'sparkMaster' on port 7077.
22/05/18 07:41:57 INFO Master: Starting Spark master at spark://<your-spark-master>:7077
22/05/18 07:41:57 INFO Master: Running Spark version 3.2.1
22/05/18 07:41:57 INFO Utils: Successfully started service 'MasterUI' on port 8080.
...
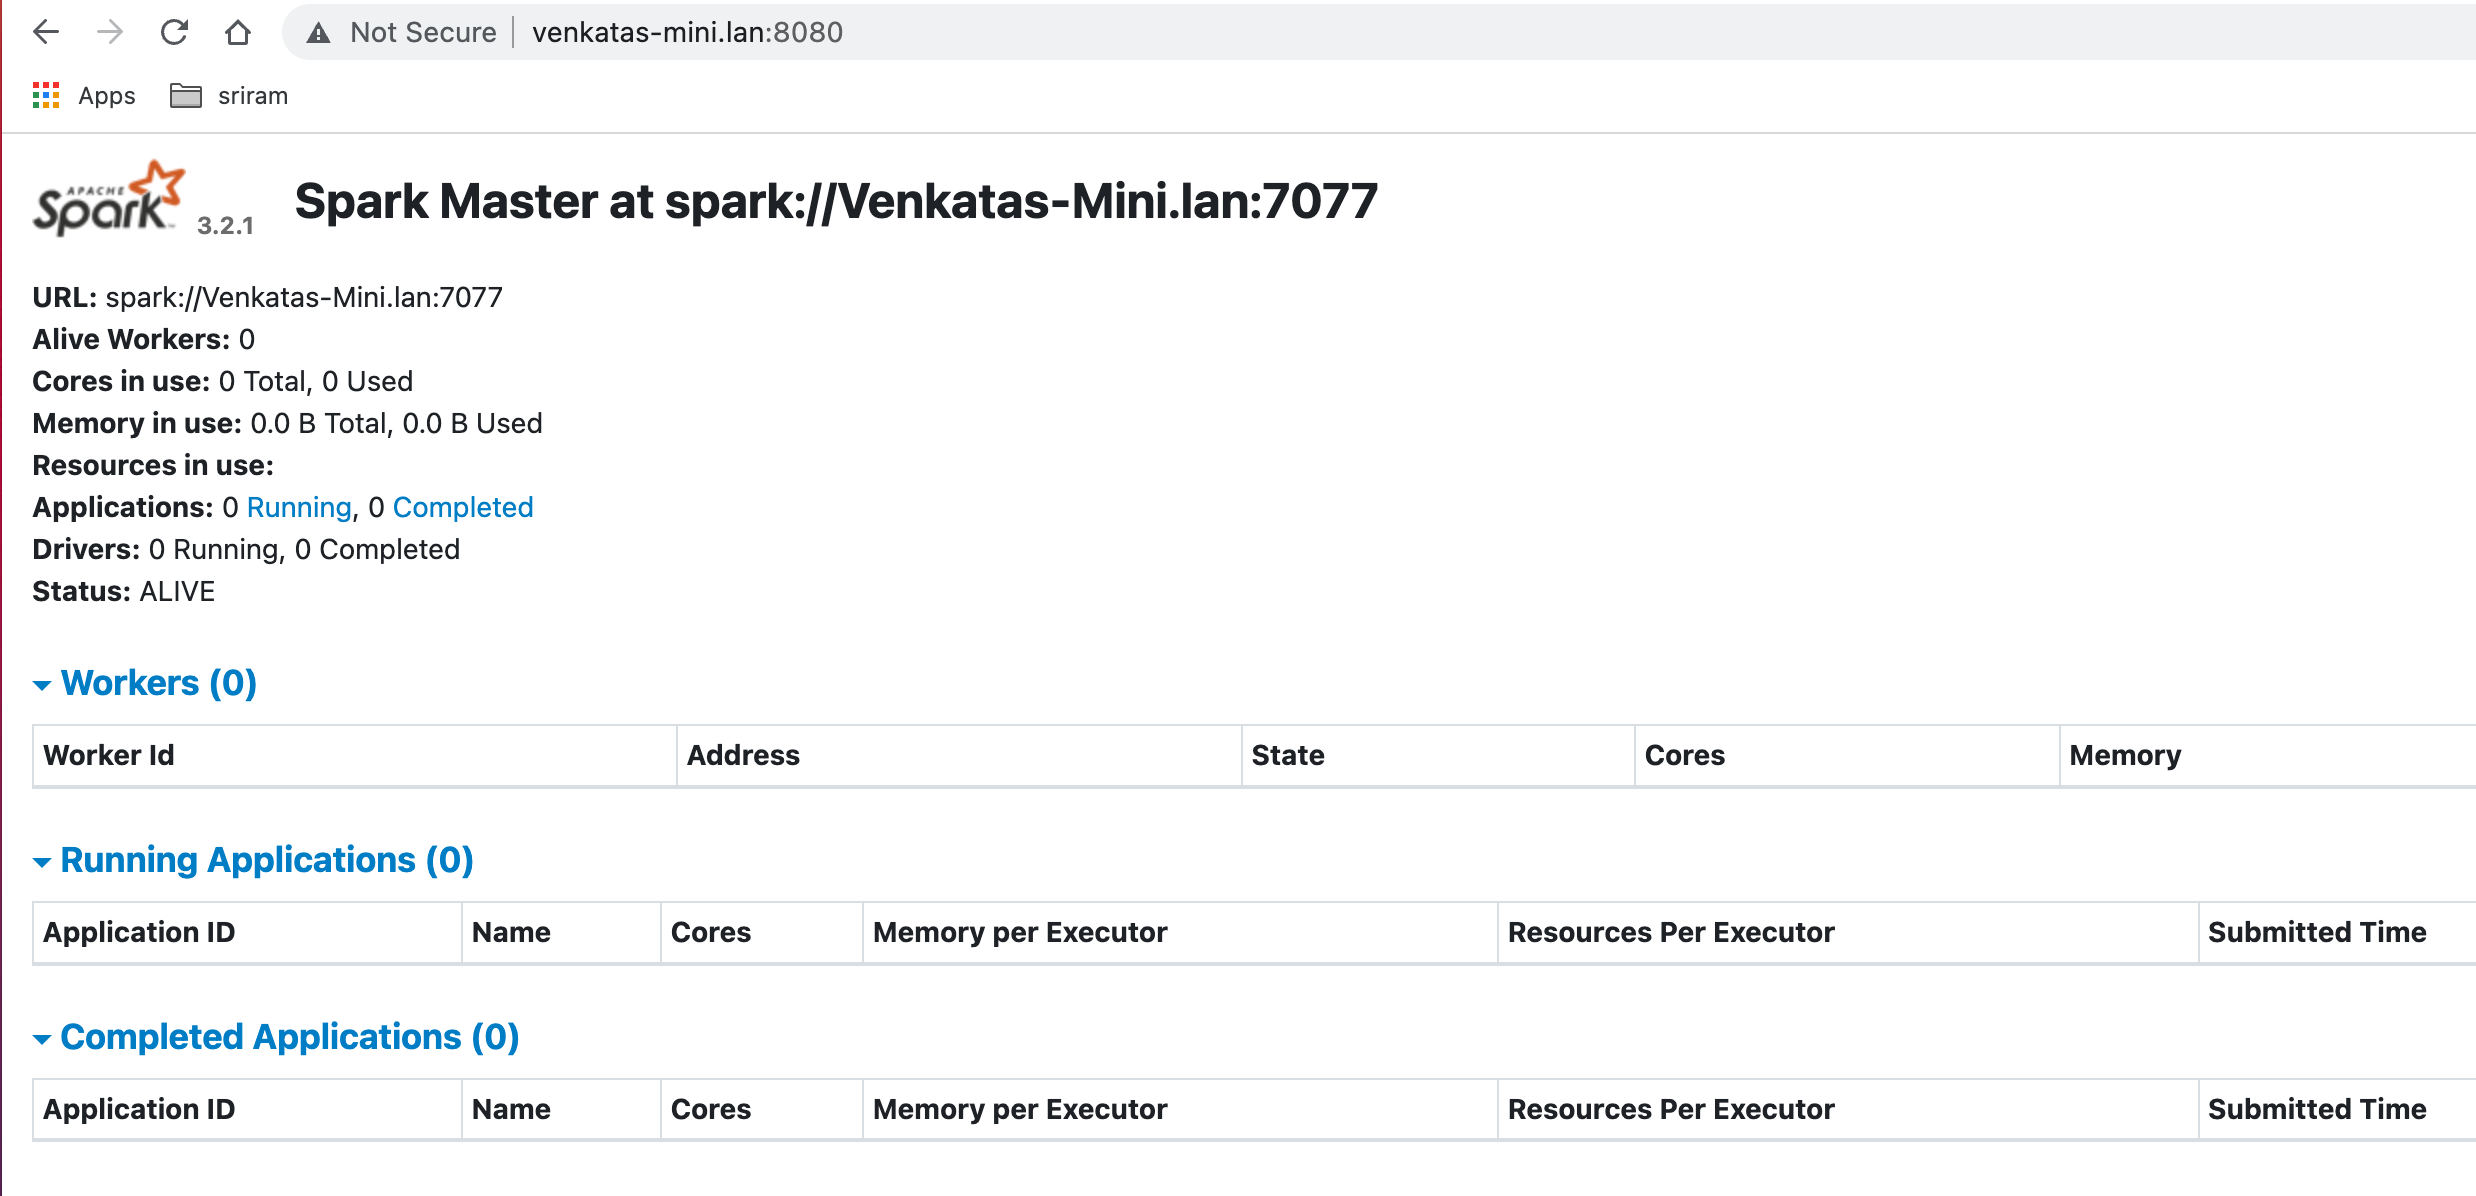
- check the master UI
- notice that workers are zero, since, we have not yet started any
- start the worker by selecting the number of cores and memory based on your system configuration.
- please check logfile in the previous step and replace with the appropriate value for
 % ./start-worker.sh --cores 2 --memory 2G spark://<your-spark-master>:7077
starting org.apache.spark.deploy.worker.Worker, logging to /opt/homebrew/Cellar/apache-spark/3.2.1/libexec/logs/<your-local-worker-logfile>.out
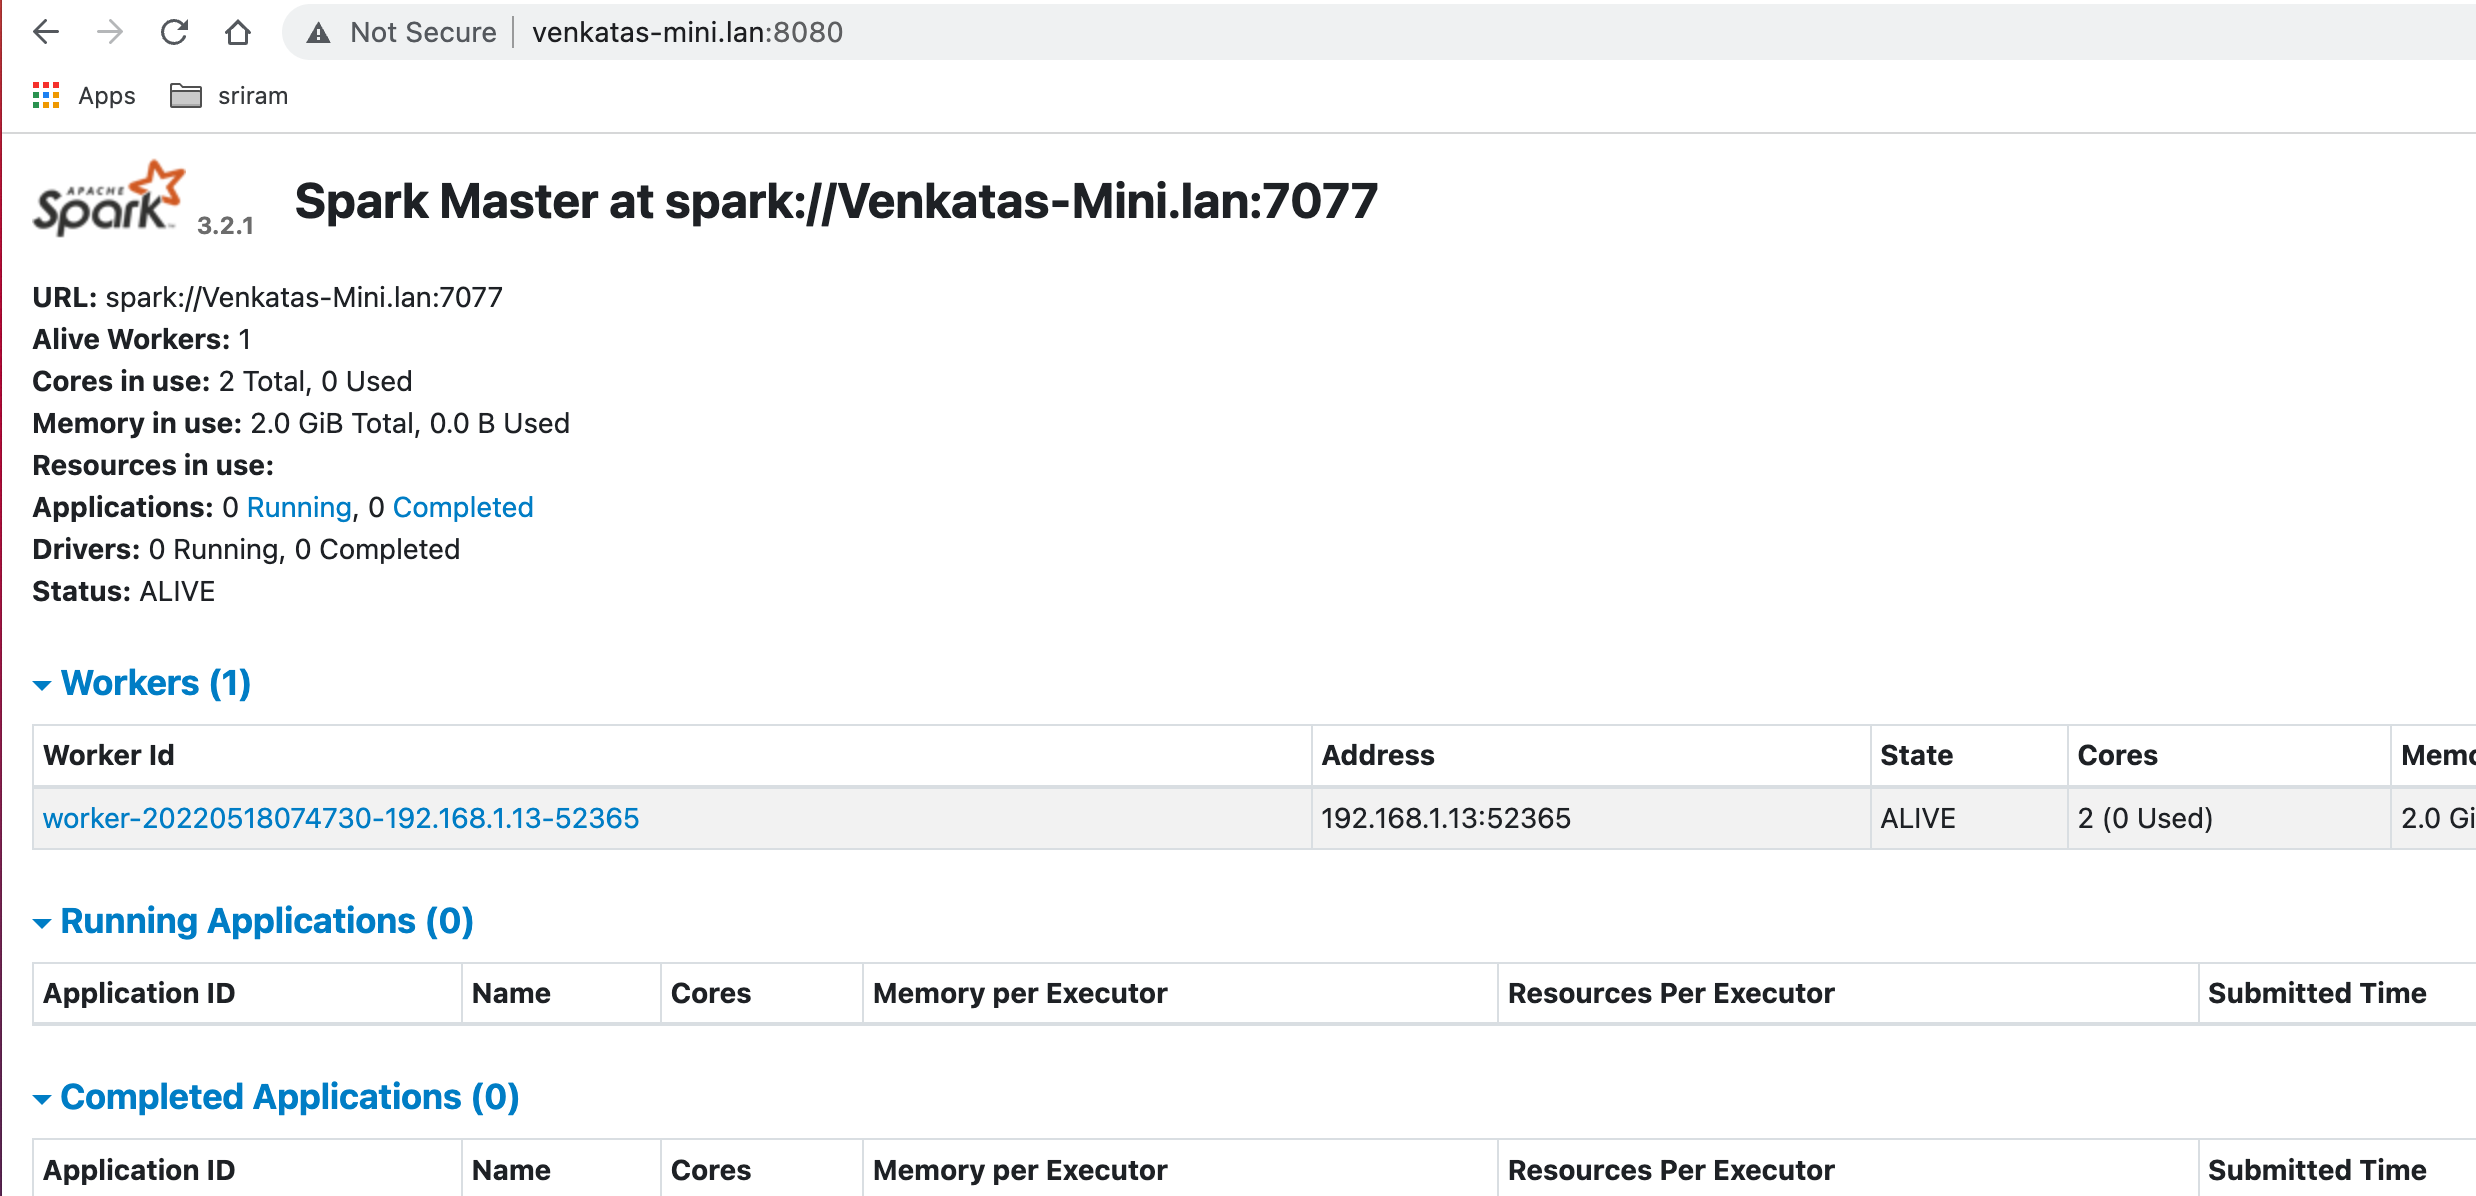
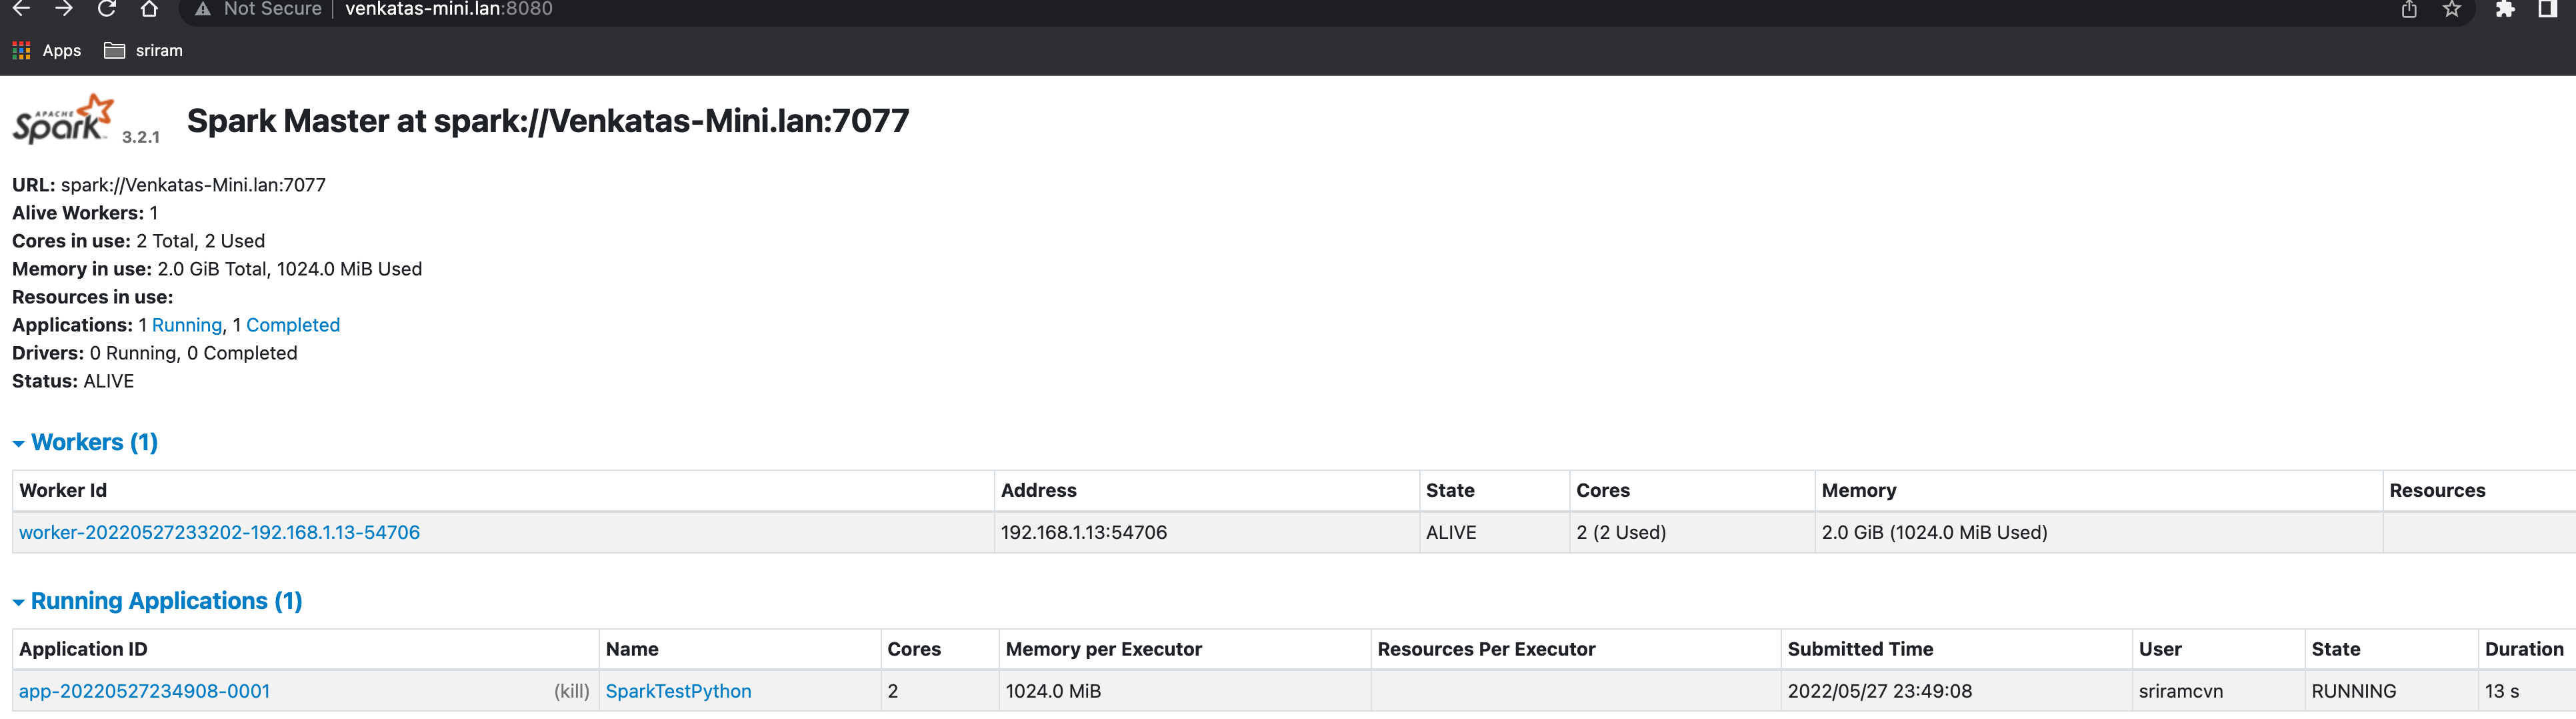
- check the master UI for worker information (now it shows 1 worker)
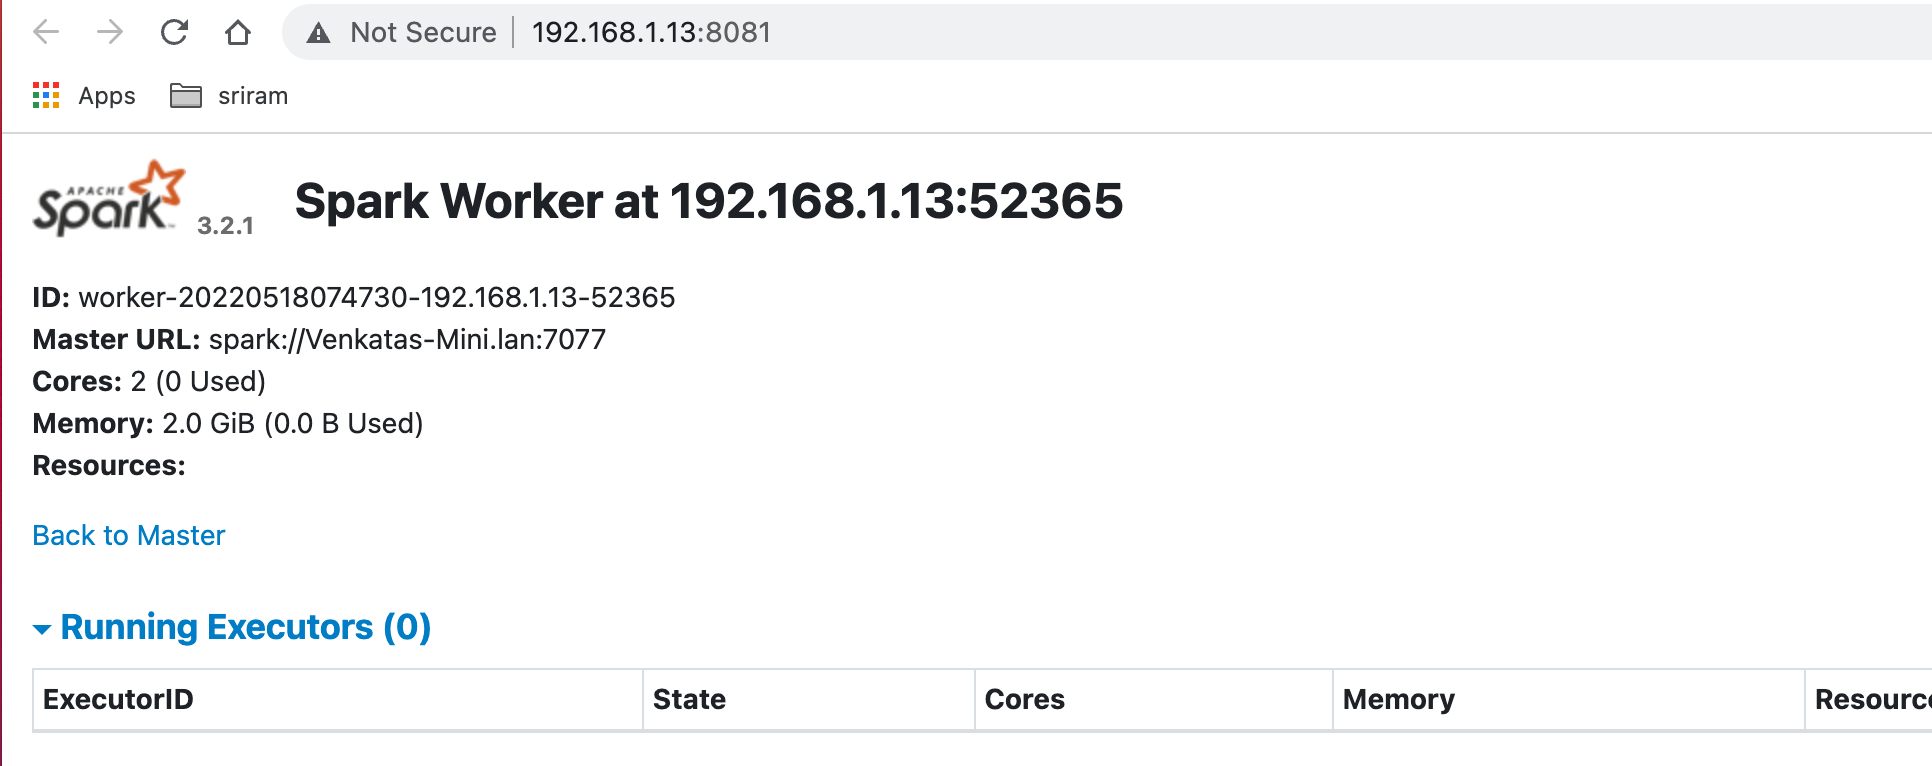
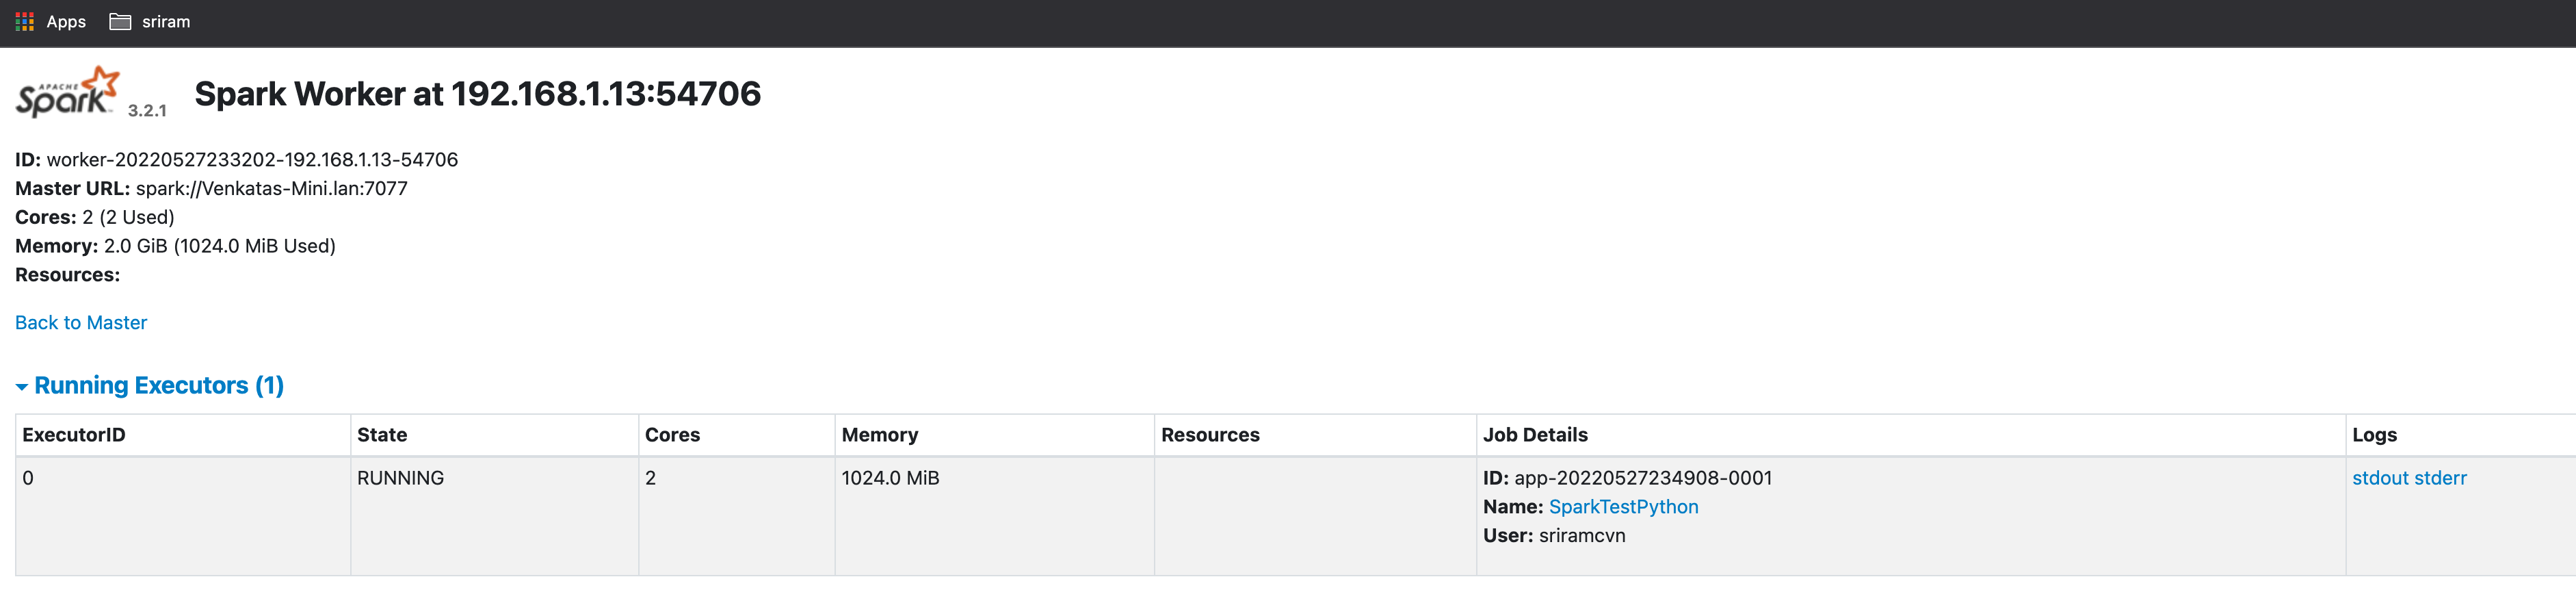
- also, check the worker UI for the cores and memory allocated
submit jobs using python in jupyter notebook and observe jobs UI
- started jupyter notebook using anaconda navigator
- write python code to submit jobs to the master setup above
- operations are performed on RDDs (Resilient Distributed Dataset)
- spark has two kinds of operations:
- Transformation → operations such as map, filter, join or union that are performed on an RDD that yields a new RDD containing the result
- Action → operations such as reduce, first, count that return a value after running a computation on an RDD
Actions could be displayed as jobs in the UI and transformations could be observed while exploring the DAG (Directed Acyclyic Graph) output
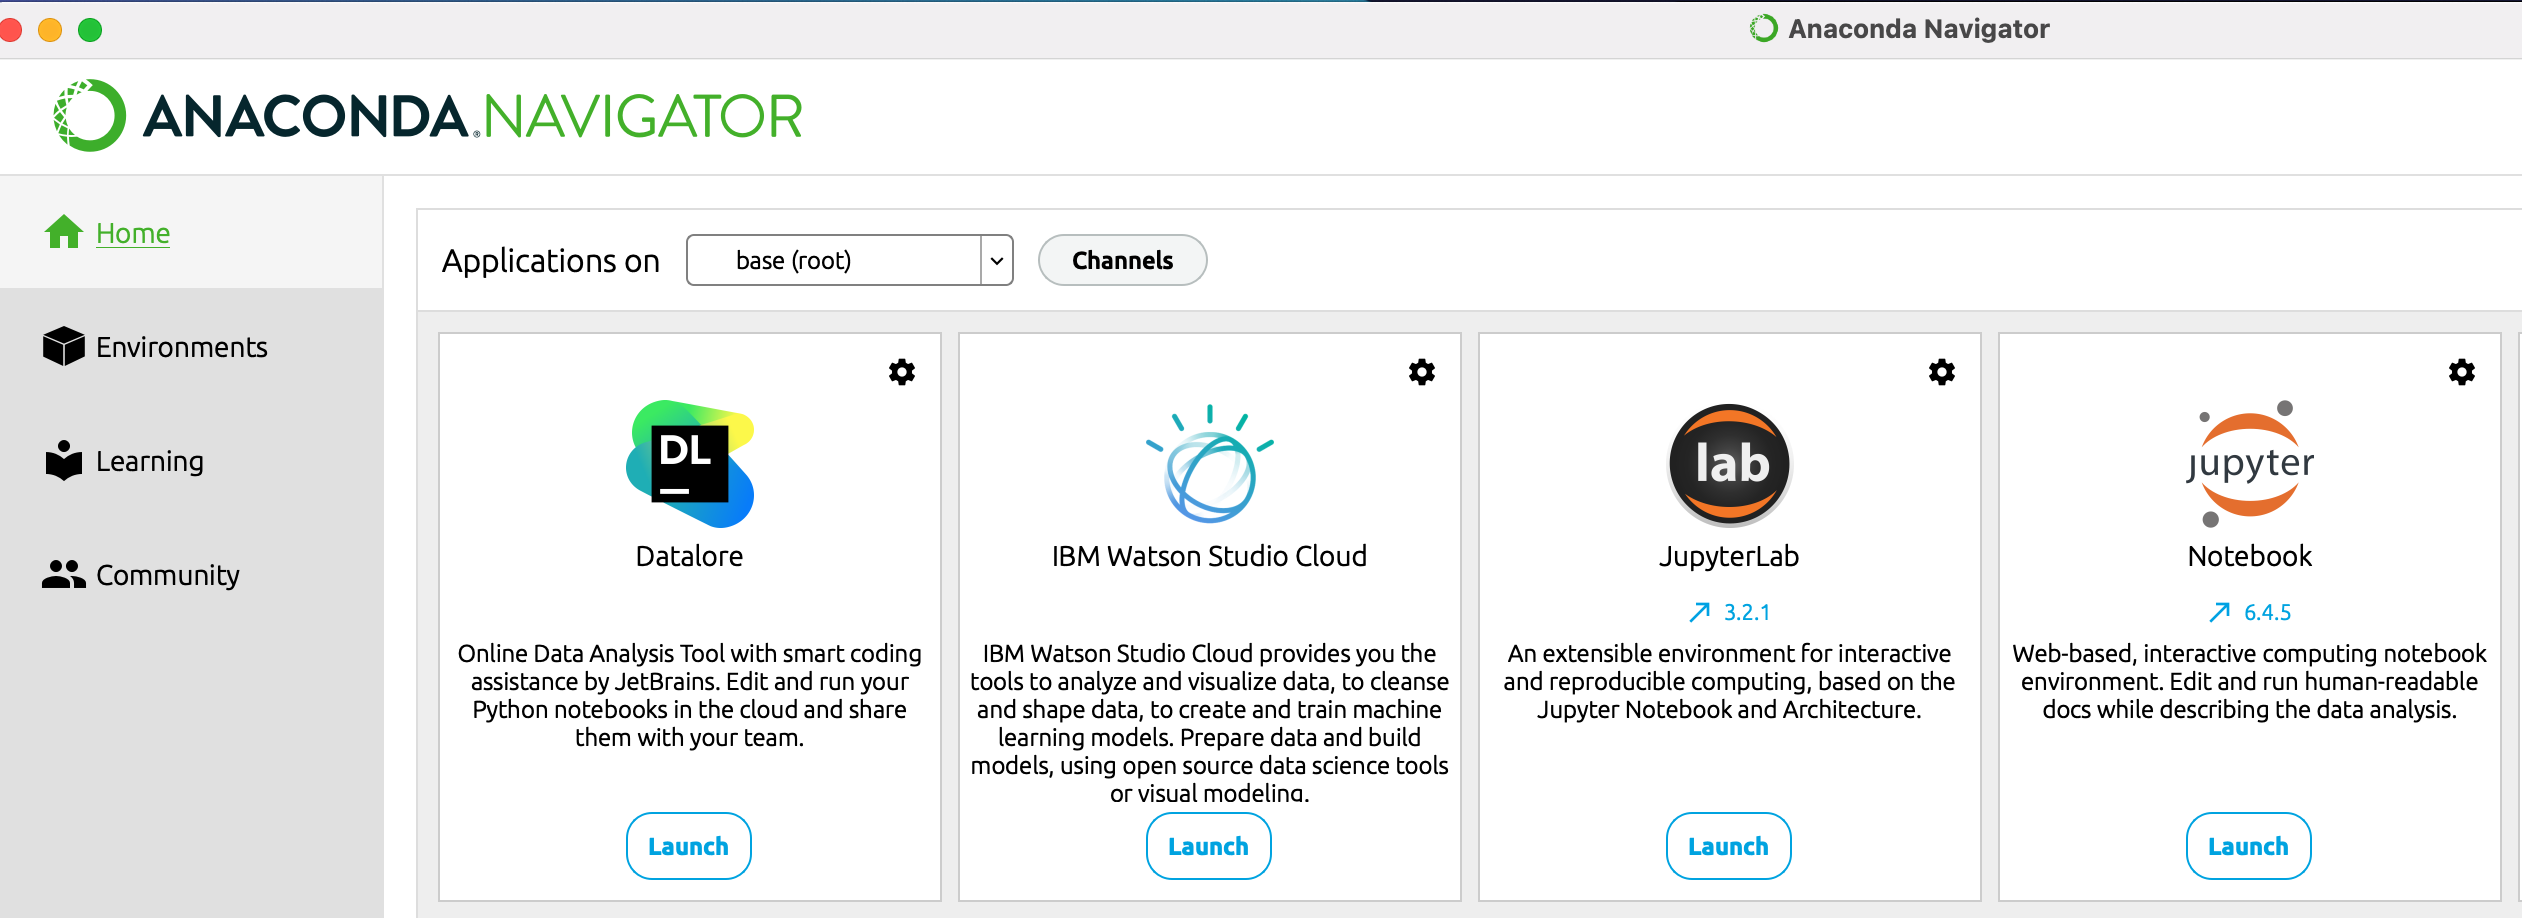
started jupyter notebook from anaconda navigator
- create Spark Application in notebook (replace with your-master)
import pyspark
from pyspark.sql import SparkSession
spark = SparkSession.builder.master("<your-master>") \
                    .appName('SparkTestPython') \
                    .getOrCreate()

print("First SparkContext:");
print("APP Name :"+spark.sparkContext.appName);
print("Master :"+spark.sparkContext.master);
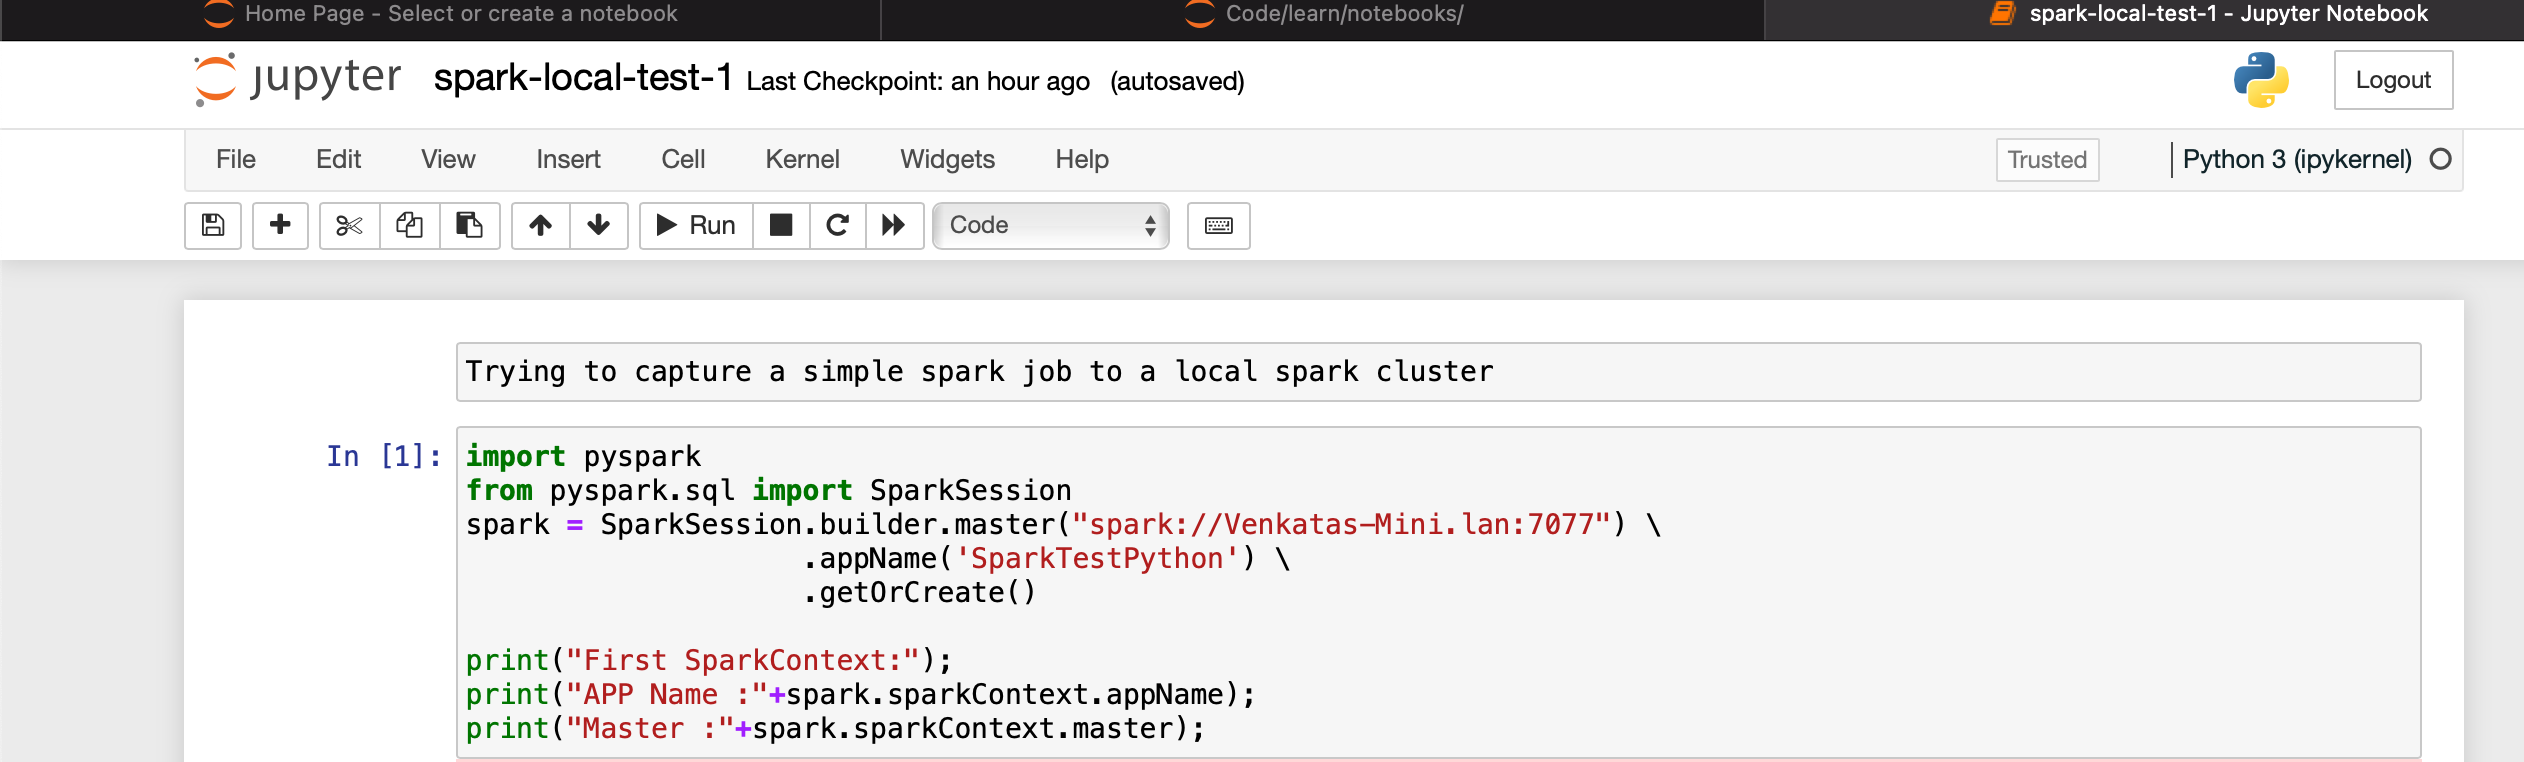
- Now observe the master and worker that the Application is listed
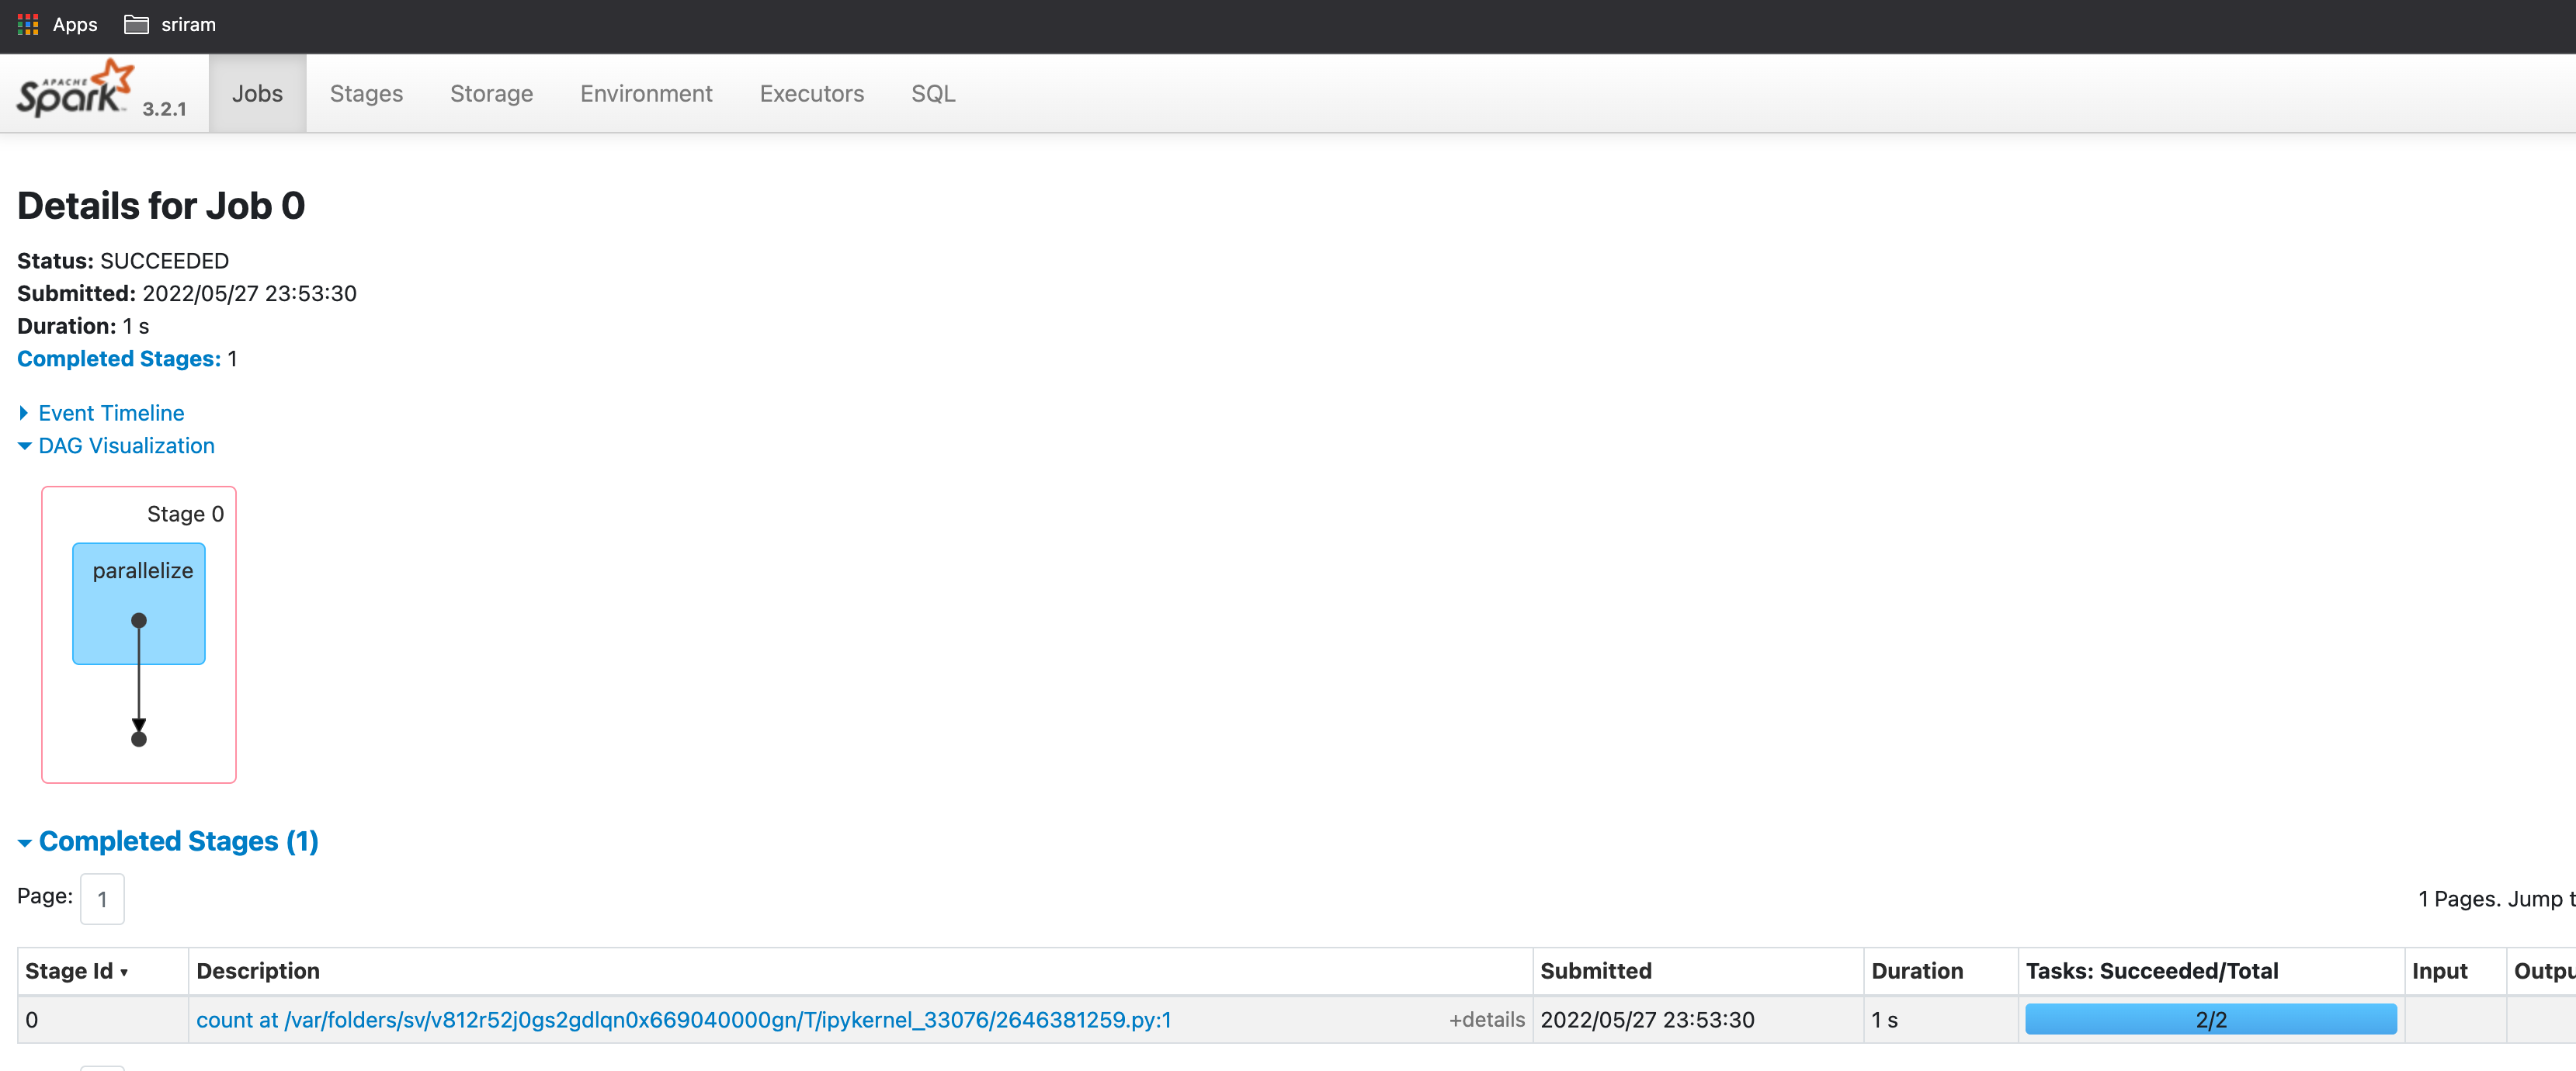
- we will write a simple code in the notebook to do one transformation (parallelize) and one action (count) operation
a=("hello","world","jupyter","local","mac","m1")
b=spark.sparkContext.parallelize(a)
b.count()

- From the master, click on the application to check the application UI:
- In the application UI, click on "Application Detail UI" to get details on the jobs
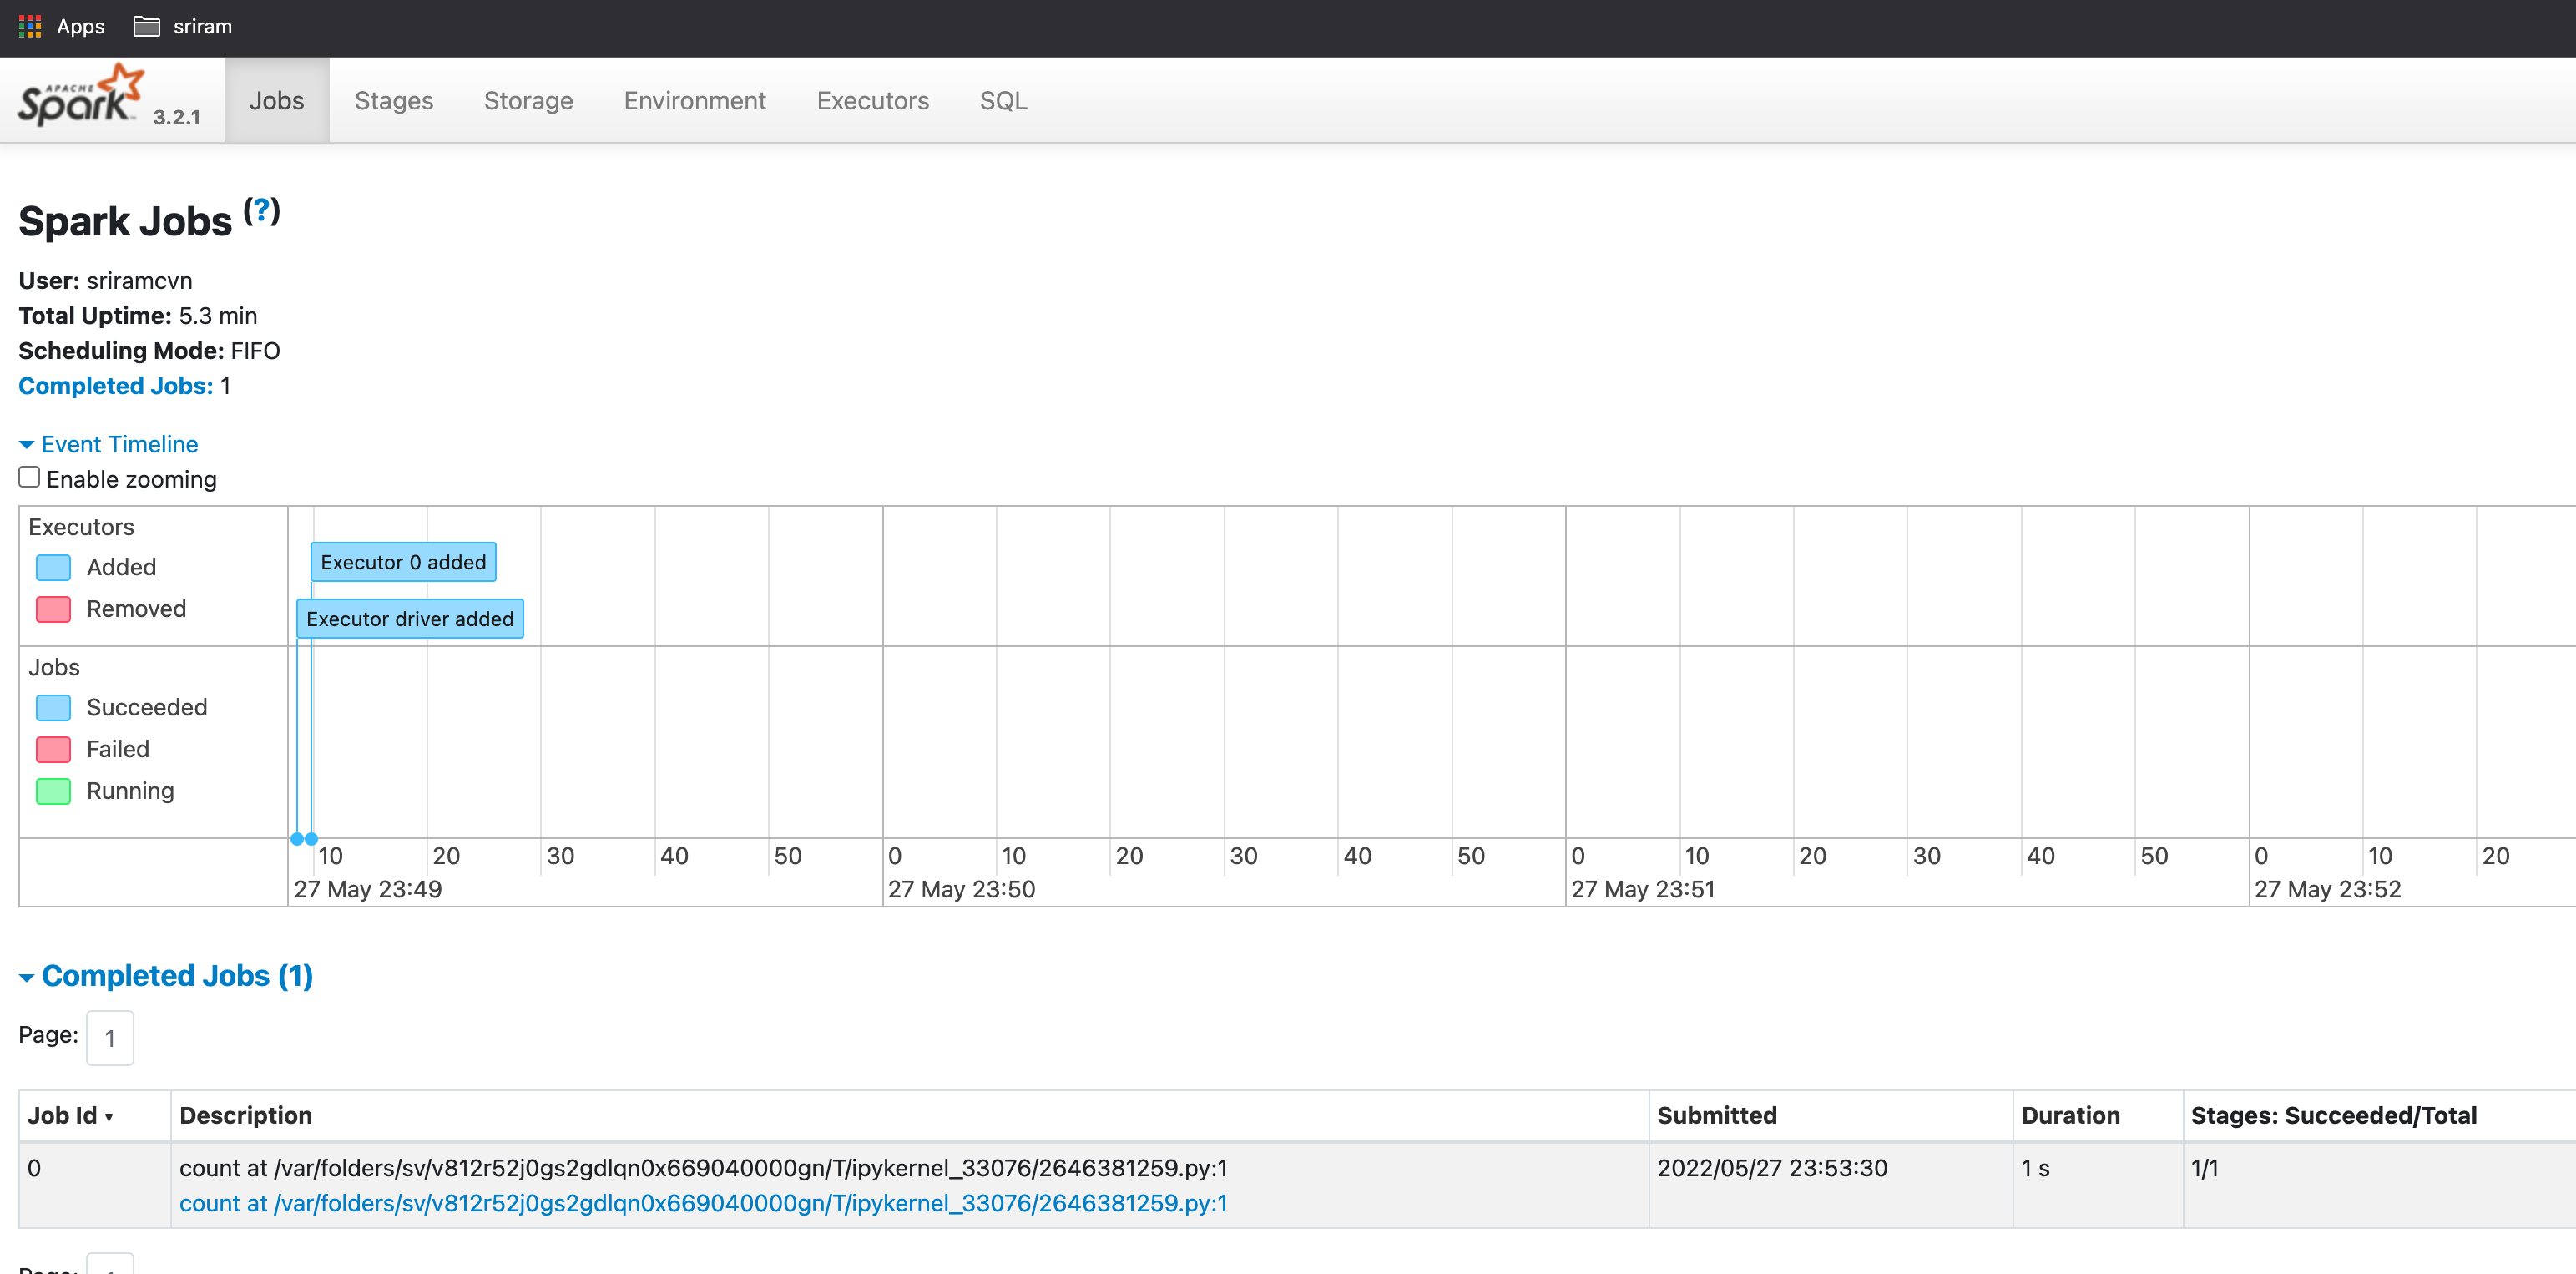
- to see DAG (Directed Acyclic Graph) visualization click on the job (under the Description column)
- this is a simple DAG with only one transformation and one operation
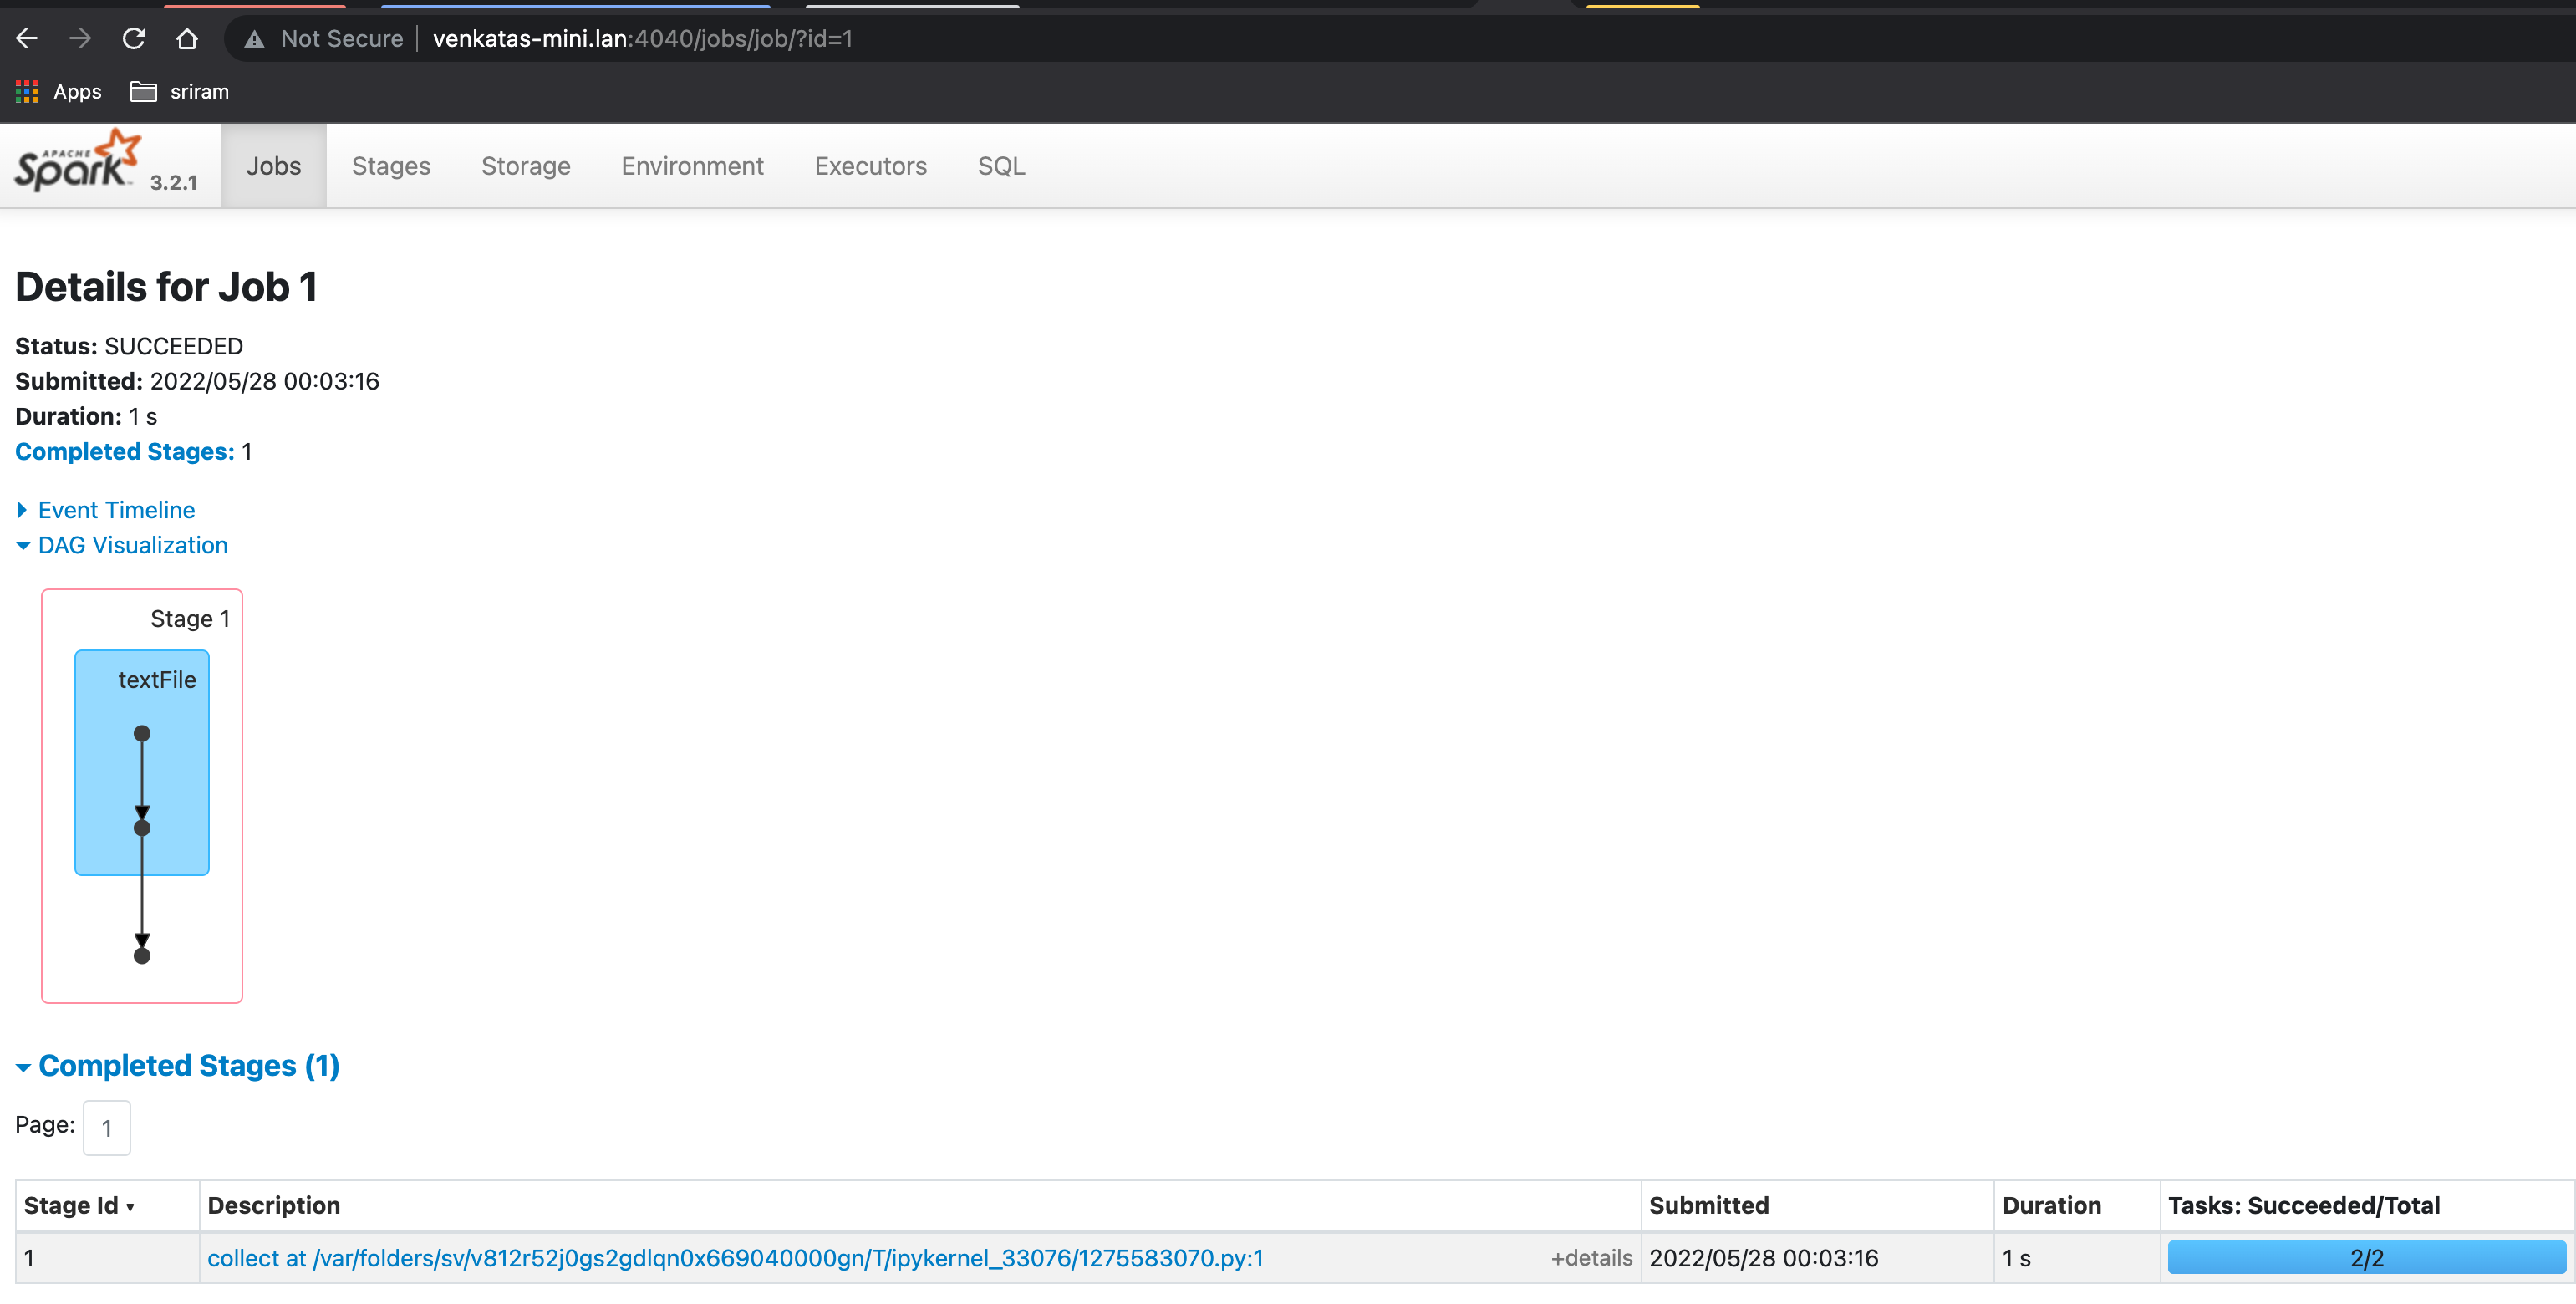
- we will write another simple code in the notebook to do two transformations (read from file and map) and one action (collect) operation
x=spark.sparkContext.textFile('/tmp/sparktest.txt')
y=x.map(lambda n: n.upper())
y.collect()

- Check the jobs UI
Next steps
- try out additional spark operations, and actions, and check additional details like storage, etc. in the UI
- using data frames
References
Comments
Join the discussionNo comments yet. Be the first to comment.